formican online test creation guide
Reviewing the design steps to online test subscription
Guide to creating an online test
First, you must register in the formican test system and log in to your account, then select the option "Create a new form" from the form design menu.
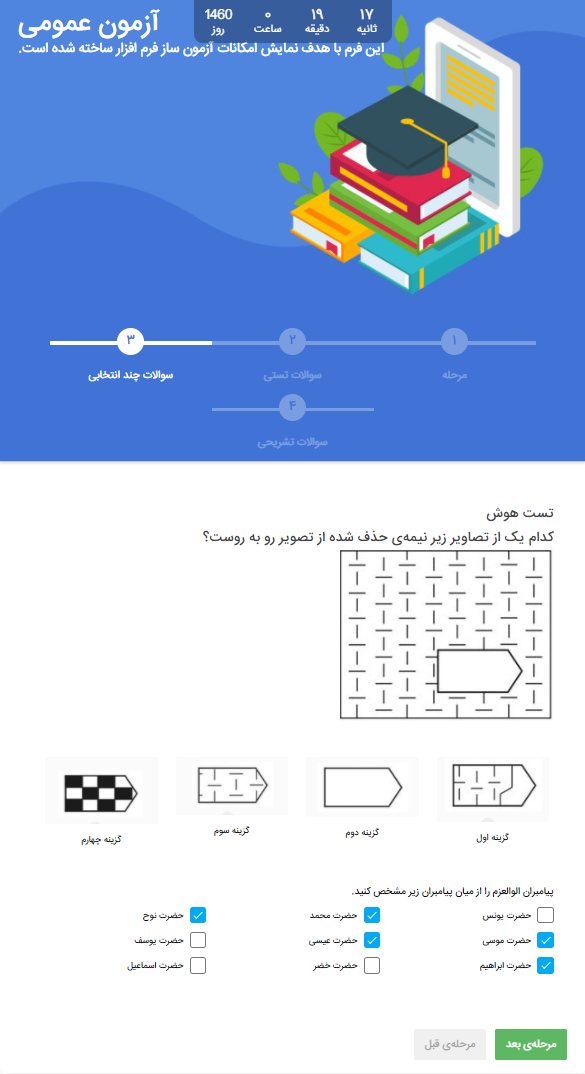
On the opened page, select the gallery option and enter section FYou will get ready ROMs that have been placed for each unique design and format that you can choose and edit the desired form, otherwise choose an empty form. In the opened window, you should choose one of the two modes "Classic display" and "Step display". In the classic display, all fields can be placed on one or more pages, but in the step display, each field is placed on one page and to display the next field, you have to go to the next step.

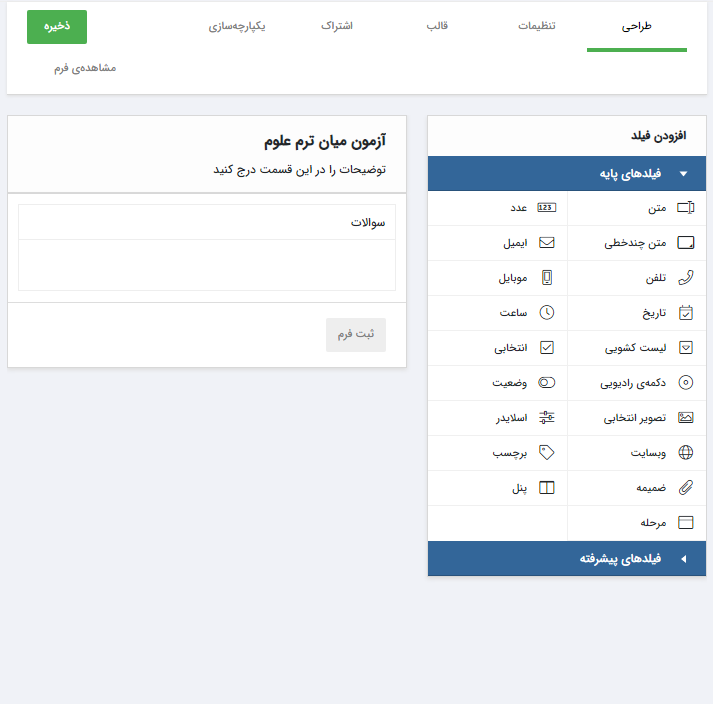
On the opened page (design tab), there are a number of basic and advanced fields that you will be allowed to use based on the type of panel. Just select the desired field and place it on the page. After placing the field on the page, clicking on it will display the corresponding field settings. In the following, the steps of making a test will be fully taught.
First step: Specifying the type of questions
The online test will generally be held in two ways: descriptive, test or a combination of the two.
Descriptive questions:
In general, to design questions that require student explanation, text, number, multi-line text and attachment fields can be used, which I will briefly explain each.
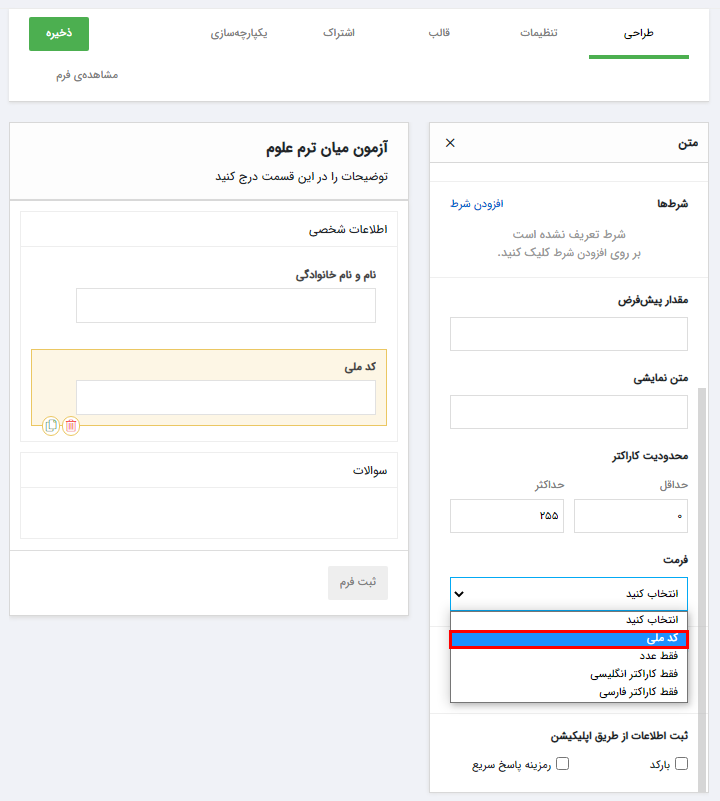
Descriptive question with short answer: If the answer is short and limited to a few words, you can use the text field. For example, to get the name and surname of the student, the best option would be to use the text field. Also, this field can be used to enter the national code by the student, just set the format to "National Code" in the field settings. In this case, the correctness of the entered national code is also checked.
Descriptive question with long answer: If the question answer is long, the most suitable field is multiple text field It is a line that can be specified in the settings of this field, the number of lines, minimum and maximum characters.
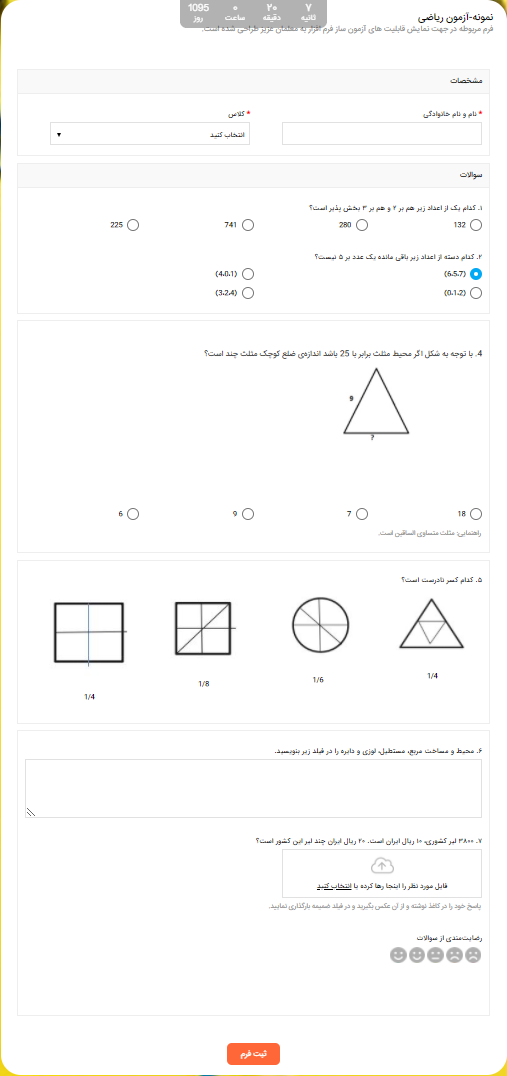
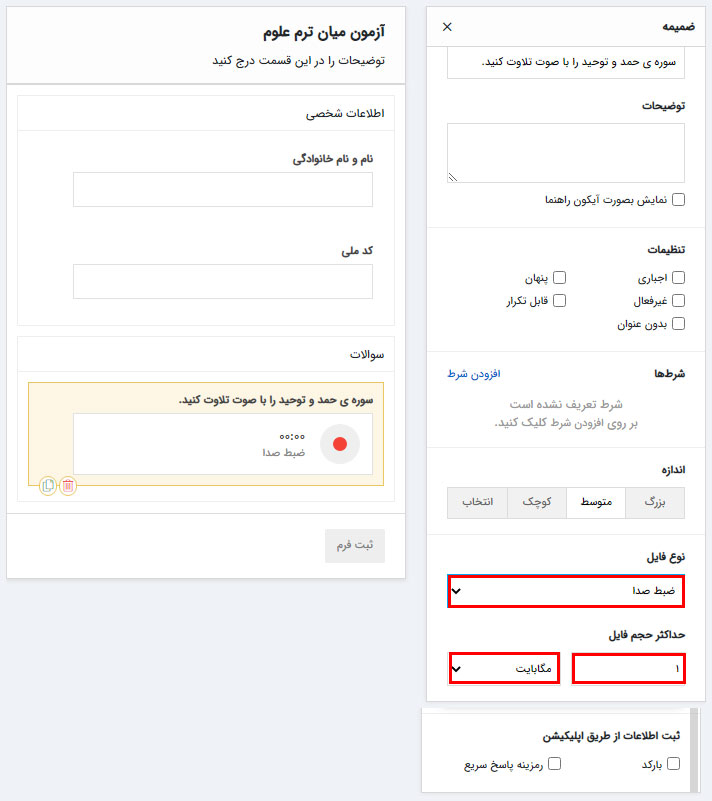
Explanatory question by receiving the file and the student's voice:< span style="font-size: 1rem;"> If a question needs to be uploaded, such as solving math questions or student's handwritten texts, it is necessary to attachment field and specify the upload file type and maximum size in the settings section of the field. To record and send the moment (like the Quran test), just change the file type to "sound recording" from the settings section of this field.
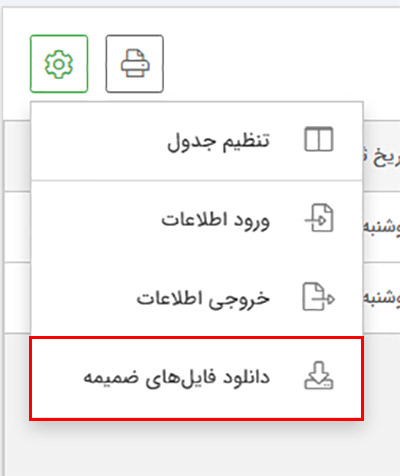
Note: As mentioned above, if you need to upload a file or image, you can use the attached field and when checking the answers received as Receive the uploaded files at once. You can also name the received files based on the fields of the form as desired, such as the student's name, national code, etc., or based on assigned values, such as ID, unique ID, registration date Save the default form to check more carefully. For this, it is enough to click on the settings icon from the sent menu after selecting the form and select "Download attached files".
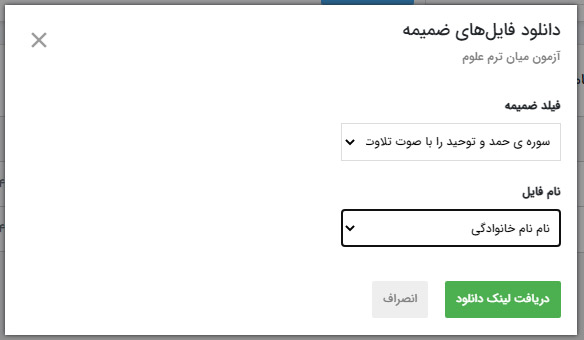
As explained above, after selecting the attached file, you can name each of the received files Identified that in this example the name entered by the student in the field "Name and name"Student's family" should be downloaded as the name of the attached file.
In test questions, it is possible to calculate the score by formican software, and in general, for test questions, you can use the "radio button", "selected image", "selective" and "drop-down list" fields.
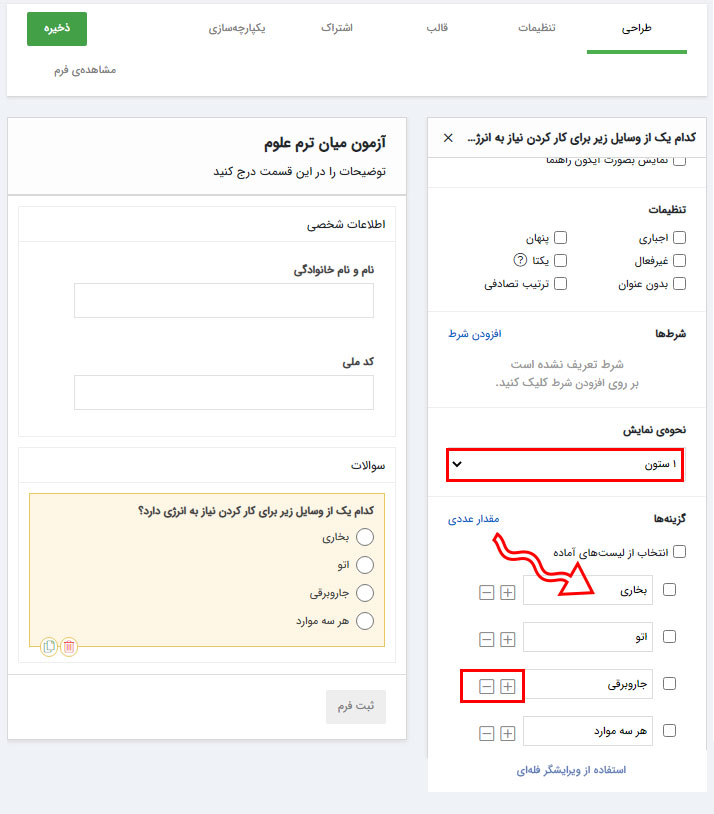
Radio button field: The most suitable field for designing multiple choice questions would be to use a radio button field because by default it allows the student to select only one of the options. In the settings of this field, you can specify how to display the options, whether in a row or a column, and the text of each option can also be specified in the field settings section. Next to each option there is a "+ -" sign, which can increase or decrease the number of question options. If there are many options, you can use the bulk editor.
Selected image field: If the options are in the form of images, you can use this field for such questions. The settings related to this field are the same as the radio button field, except that it is possible to select more than one option in this field.
Selective field: Using this field, the student is given the opportunity to choose more than one option. An example of these questions is in the image below. you observe
Dropdown list field: Like the radio button field, this field is single-selection and the options can be displayed as a dropdown.
Description of common settings in fields
In the title section of each field, you can write down the question and write the description of the question, such as the guide, in the description section, and if you want it to be placed in the form of an icon in front of the question, you can activate the "Show as a guide icon" option, otherwise The description text will be placed at the bottom of the field.
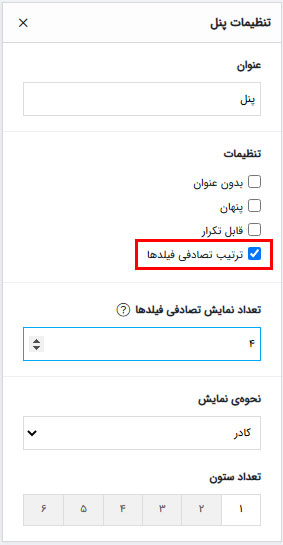
Note: In radio button and choice fields that are suitable for multiple-choice questions, by activating the "random display" option in the settings of these fields, the question options will be displayed randomly for students. If the questions are in a panel, the display of the questions can be randomized and limited. For example, you have designed seven questions in a panel and you want four questions to be displayed randomly and without the same order for each student. It is enough to activate the "Random order of fields" option and enter the number four in the "Random display number of fields" box. write the
The second step: Loading the questions
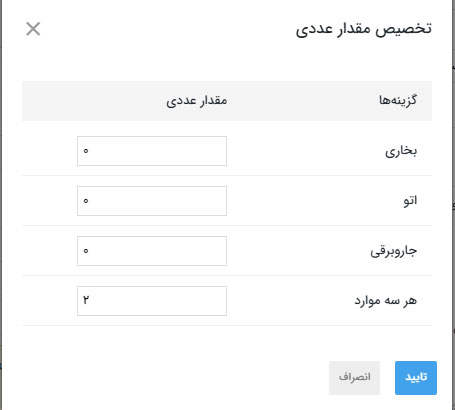
As mentioned above, it is possible to correct questions automatically by formican only in multiple-choice questions. To specify the number of questions in the settings section of the fields that were mentioned in the test questions section, click on the numerical value.

By specifying the numerical value of each option, that number is assigned to the desired option and is assigned to that question during the score calculation. For example, the number of questions in the test is 10 and the test is of 20 marks. In this case, the numerical value should be 2 for the correct option and 0 for the remaining options of each question.
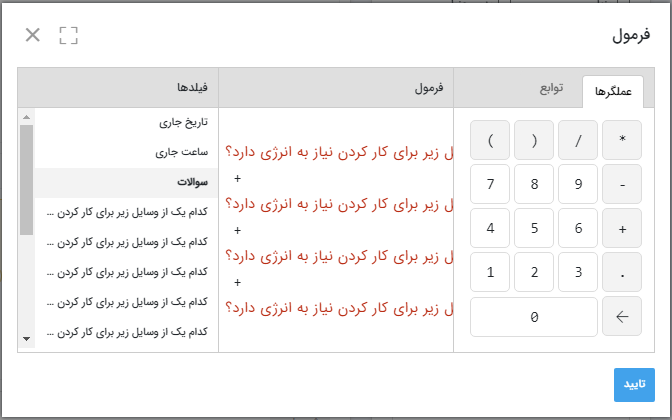
Next, use the formula field to calculate grades. Put a formula field on the page and enter the formula section from its settings.
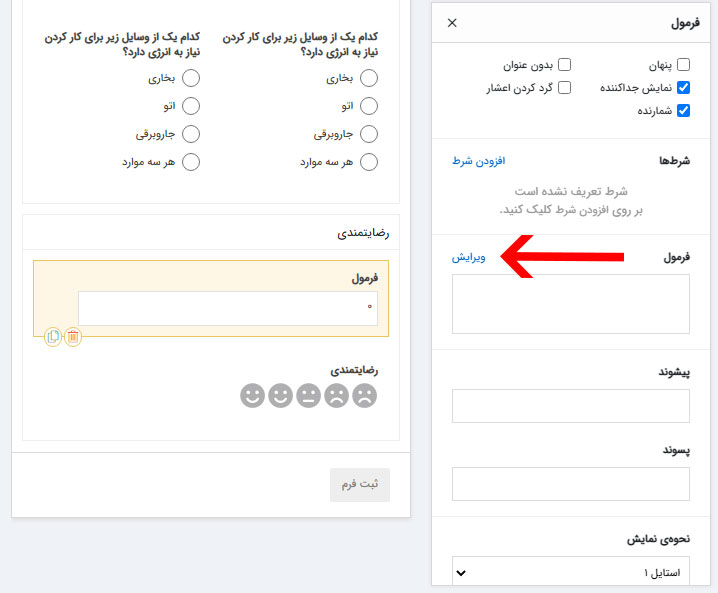
is displayed in the question formula section, select each one and put addition between them. Confirm the changes.
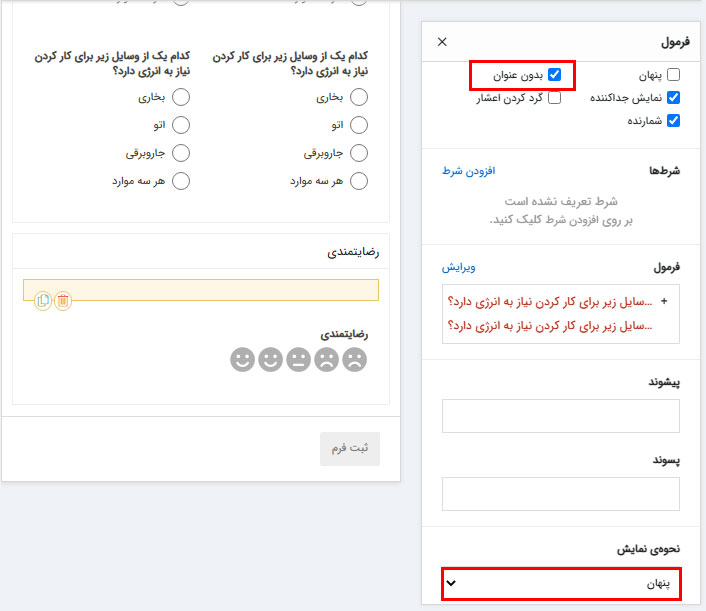
To hide the formula field, you must set the display mode to hidden mode from the field settings and activate the untitled option. In this way, the result will not be shown to the students during the test.
The third step: display the result and time of the test
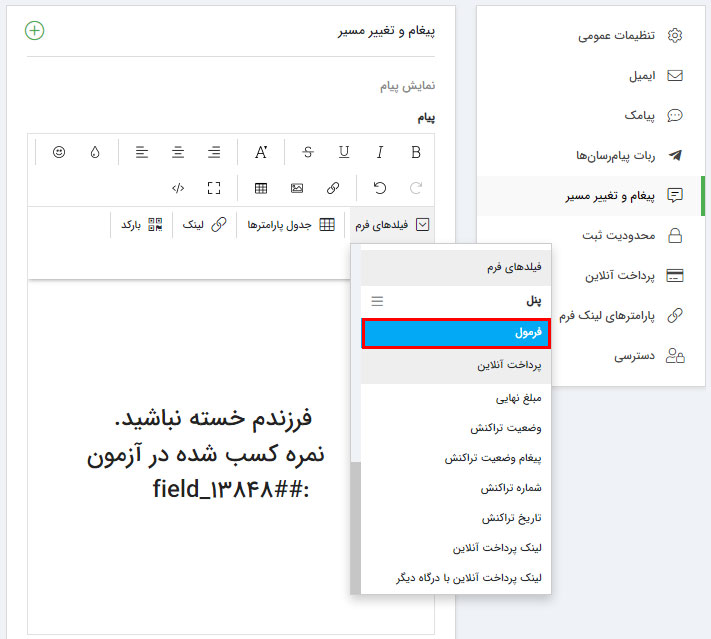
Displaying the test result: After designing the test, enter the settings tab and select "Message and Redirection" from the menu, and in the message box you can enter the message that will be sent later. After completing the test, you want to show it to the students, and to announce the result of the test, select the formula field that you entered in the test from the "form fields".
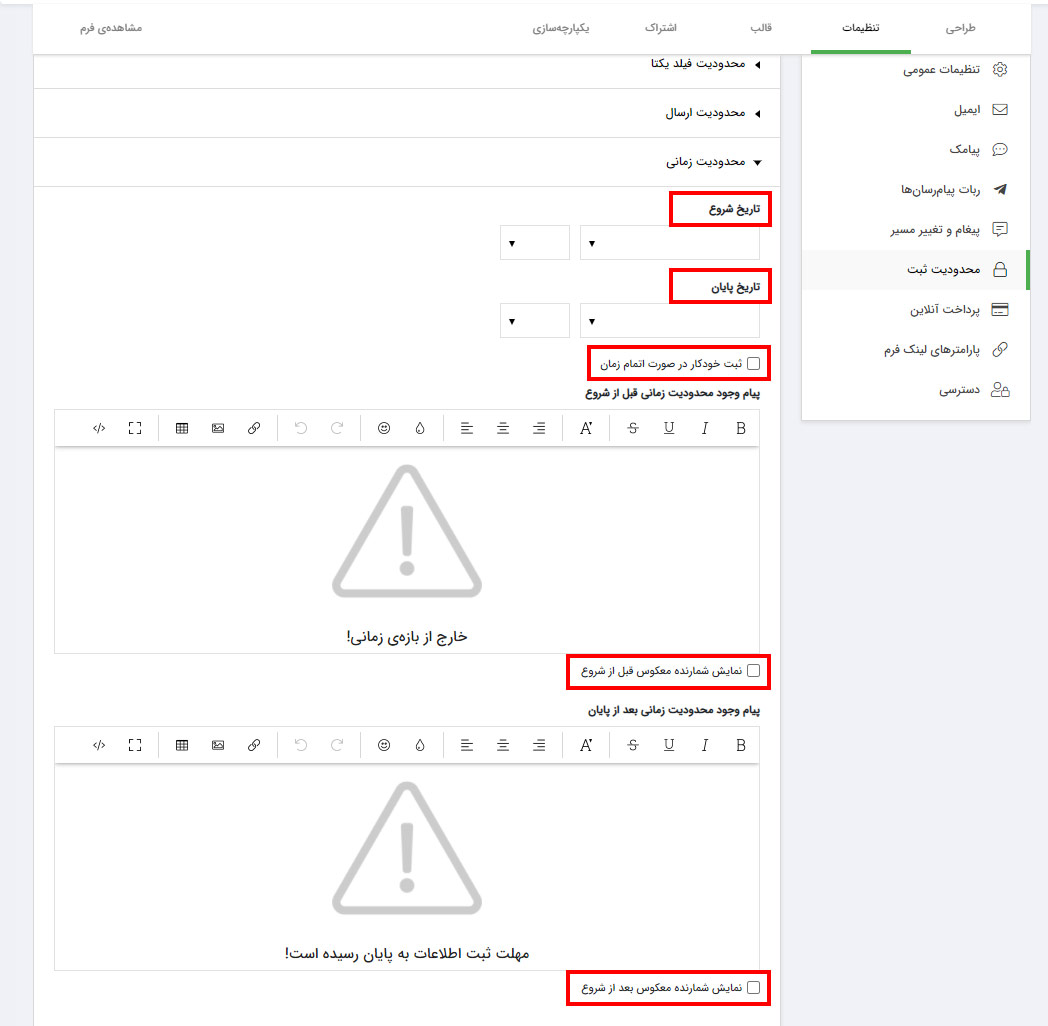
Time of the test: To specify the time period of the test and its duration, select the settings tab and the registration limit from the menu. Enter the "Time limit" section. Specify the start and end time of the test. To display the counter before the start of the test, activate the option "Show countdown before the start" and to display the counter during the test, activate the option "Show countdown after the start".
By activating the "automatic registration when the time is up" option, the information entered in the test will be registered by the student even if he did not press the registration button.
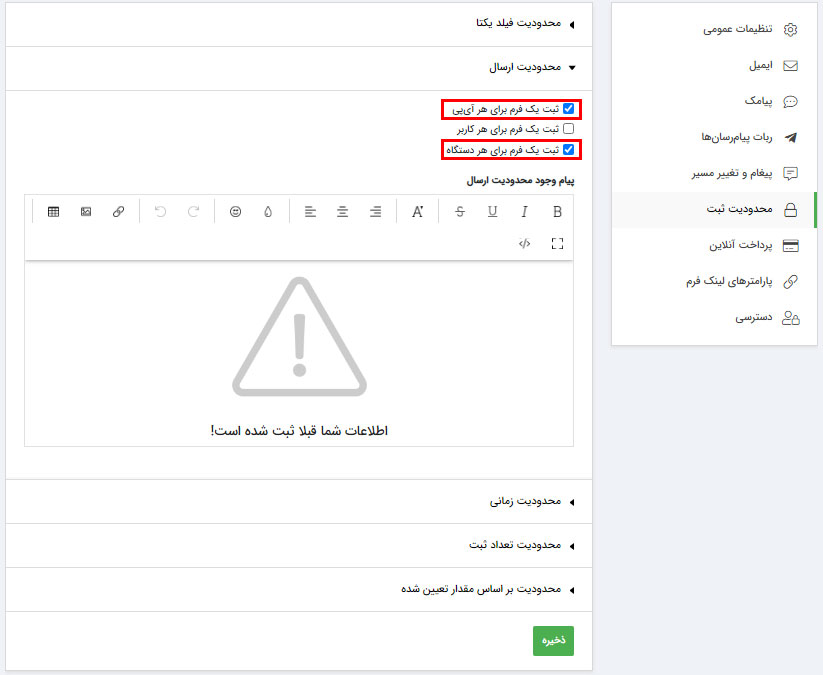
Fourth step: Restrictions on recording information
To minimize the amount of cheating in the exam (each person can only participate in the exam once or cannot participate in the exam instead of another student), you can go to the settings tab and select the registration restriction option, enter the submission restriction section, and select the "Registration" options. Enabled "one form for each IP" and "registration of one form for each device".
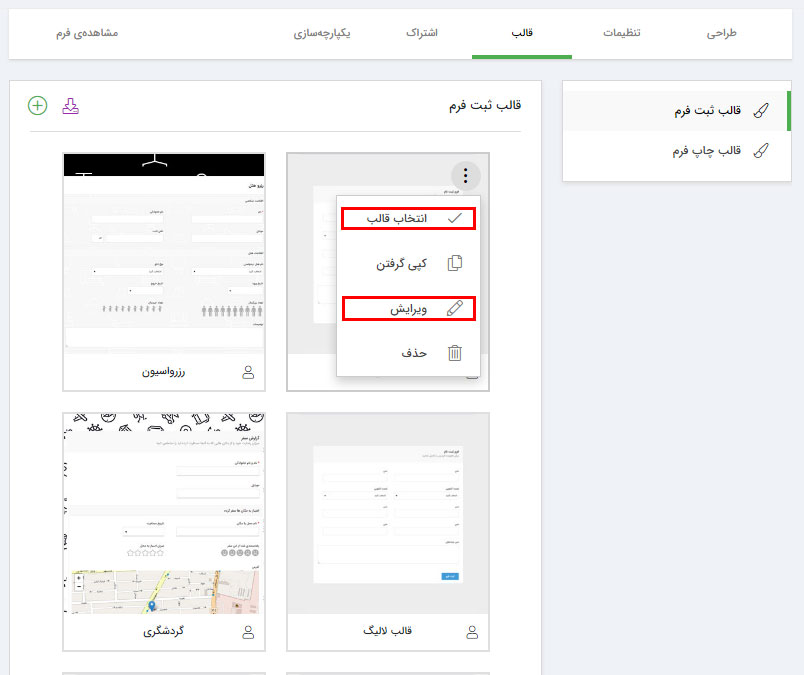
The fifth step: choosing the format for the test
After designing and applying the settings of an online test, it is time to choose a format for it. Enter the "form registration template menu" from the template tab. In this section, it is possible to use ready-made templates and edit them, you can also design your desired template.
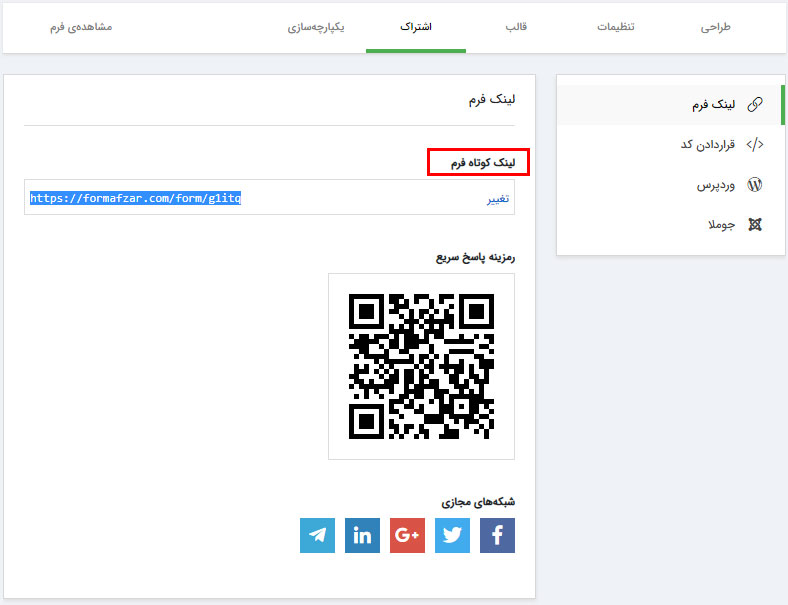
The last step: sharing the test
Now it's time to share the test. From the subscription tab, click on the form link and copy the test link and provide it to the students. According to the settings made at the time of the test, if the link is provided to the students before the start of the test, when they open it, they will be shown the remaining time until the start of the test.